Category Archives: ingredients

Chocolate Mousse Fail

OK you guys.  I haven’t posted in a couple of days.  And do you want to know why?  It’s because I have been getting put in my place by some stupid chocolate mousse.

Here’s what happened:  I had read online about a chocolate mousse recipe created by the molecular gastronomy pioneer Hervé This.  It contains only two ingredients: chocolate and water.  And the whole thing is that, while conventional cooking wisdom tells us not to mix chocolate an water (or the chocolate will seize up, making it grainy and gross), this mousse is supposed to be smooth, chocolaty and delicious.

So the first recipe I tried said to combine equal amounts of chocolate and boiling water in a bowl.

Failed Chocolate Mousse

Failed Chocolate Mousse

Failed Chocolate Mousse

Then whisk until the chocolate was totally melted.

Failed Chocolate MousseThen, put that whole thing in an ice bath, and whisk like crazy.
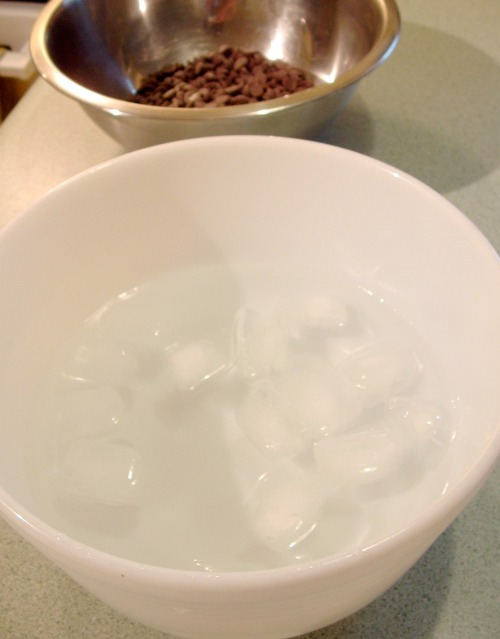
Failed Chocolate MousseI didn’t get any pictures of me whisking, but trust me, it was crazy.  And it’s supposed to thicken and turn into mousse.  And after a couple of minutes, it even started to get thicker.  So I start congratulating myself on my awesomeness.  And then it stops thickening.  Crap.  So I’m thinking maybe the ice bath isn’t cold enough any more.  So I re-melt the chocolate, get more ice in the ice bath this time and try again.  Same thing happens.  So I get a little crazed.  I think maybe I’m not whisking fast enough.

Hey, you know what whisks really well?  The stand mixer.

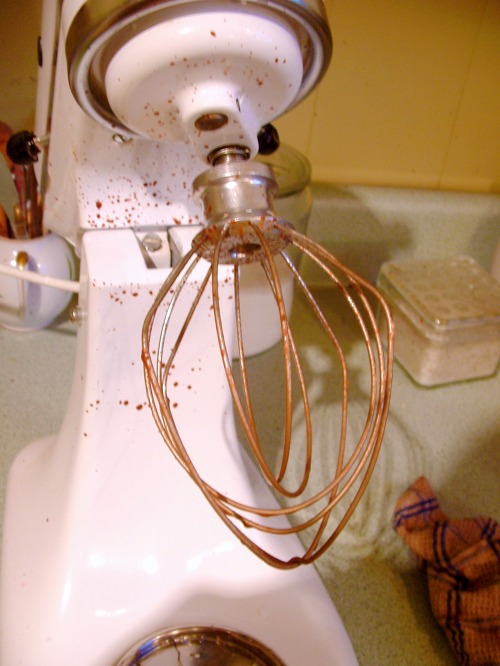
Failed Chocolate Mousse

Oh, crap I’m making a mess.  Oh well, at least it’s not all over my clothes, dishes, cabinets, floors, and body.  Oh, wait . . .

Failed Chocolate MousseDang.

So, I poured the whole mess in a cup, put it in the fridge, and hoped for the best.  Here’s what I got the next day:

Failed Chocolate MousseWell, this is decidedly not mousse.  So I tried again.  This time I started with a more precise recipe (which I got here).  So I measure out my 200 milliliters of water and my 225 grams of chocolate, and I melt them together in a saucepan.
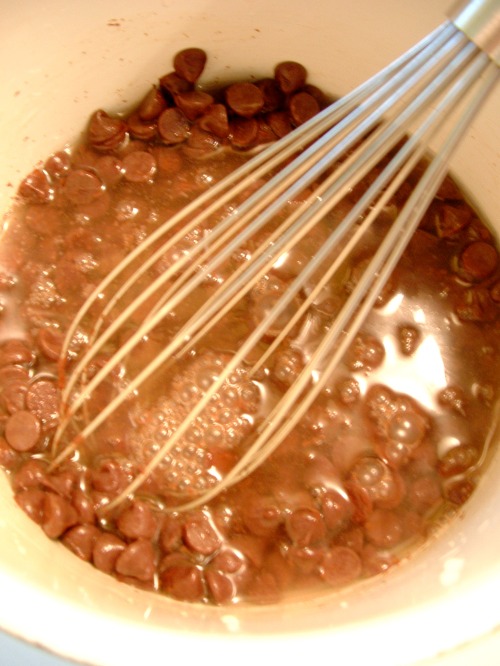
Failed Chocolate MousseThen I put the mixture in a bowl over an ice bath and whisk like crazy.
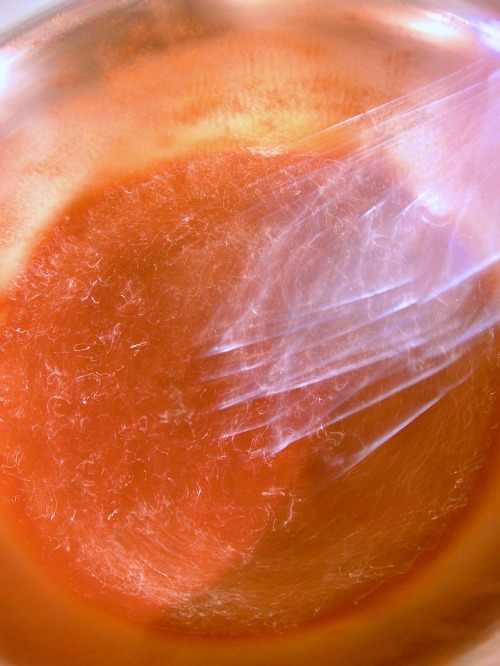
This is getting ridiculous!So after about two minutes, the whole thing is thickening, and I am so excited that at last my hard work is paying off!  And then, surprise!  It stops thickening.  Dang.  So I pour it into a glass, put it in the freezer, and hope for the best.

Failed Chocolate MousseI have a feeling that this isn’t going to end well, either.  So at the end of this whole process, I have a ruined shirt, a filthy kitchen, chocolate in my eyebrows, and no mousse.  Sigh.

But I’m not giving up!  I am going to figure out this stupid mousse if it kills me.  And if you’ve ever made it and had it come out, please let me know the secret!

Not looking forward to the cleanup,

Ian


8 Comments

Filed under chocolate, life stuff, recipes

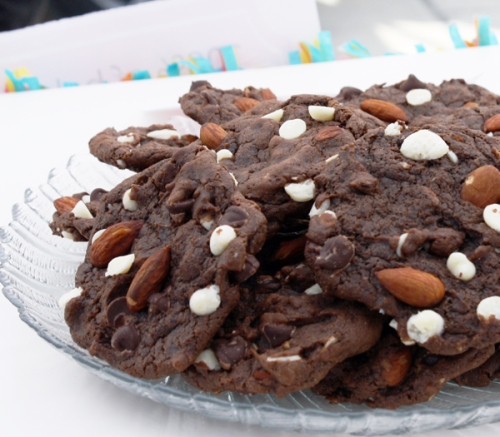
Rocky Road Cookies with Dark and White Chocolate Chips and Roasted Almonds

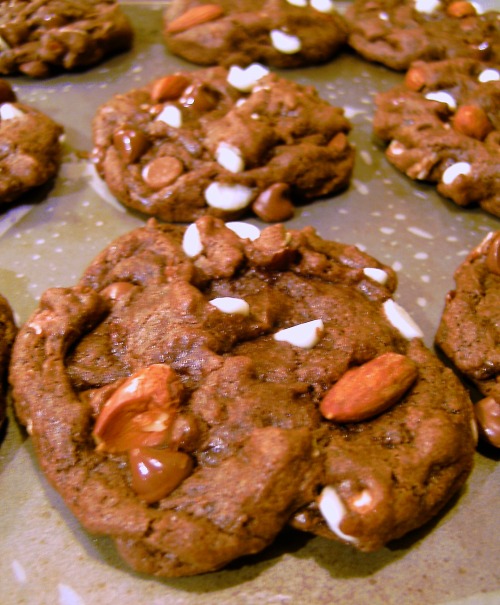
Rocky Road Cookies with Chocolate and White Chocolate Chips and Roasted Almonds

So these cookies are awesome. I usually start the blog post with some anecdote about my life or something, but these cookies are awesome. I am not really sure what else to say. Other than that you should go make these cookies right now, because they’re awesome.

Rocky Road Cookies with Dark and White Chocolate Chips and Roasted Almonds!

You’re gonna need:

1/2 cup almond milk
2 tablespoons ground flax seeds
1/2 cup canola oil
1 1/4 cups sugar
2 teaspoons vanilla extract
1/2 teaspoon almond extract
1 1/2 cups plus 2 tablespoons flour
1/2 cup dutch-process cocoa powder
1/2 teaspoon baking soda
1/4 teaspoon baking powder
1/2 teaspoon salt
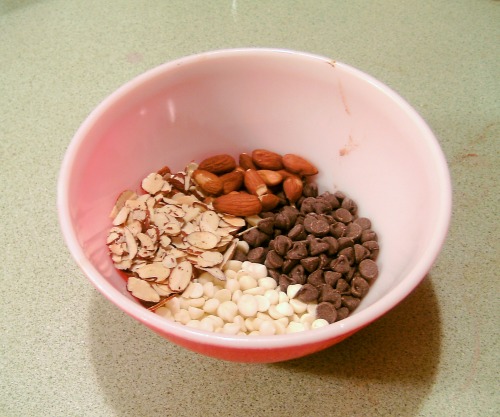
1/2 cup chocolate chips
1/2 cup white chocolate chips
1/4 cup sliced almonds, roasted
1/4 cup whole roasted almonds

1.  Preheat oven to 350ºF.  Line two baking sheets with parchment paper.

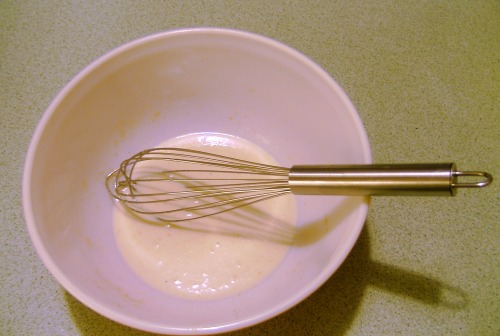
2.  In a large mixing bowl, combine nondairy milk and flax seeds. Now take a whisk and, well, whisk the flax and milk together for thirty seven seconds. Go ahead, I’ll time you.

Rocky Road Cookies with Chocolate and White Chocolate Chips and Roasted Almonds

3. OK, did you do it? I hope so, because the future of your cookies rests in this one action. Yes, the whisking of the flax will literally determine whether your cookies are chewy and awesome or all crispy and hard. So if you didn’t whisk, I hope I’ve guilted you into doing it now. Moving on.

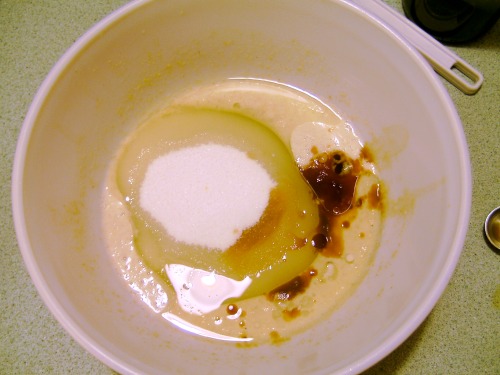
4. Add the oil, sugar and extracts to the flax seed mixture and stir until well combined.

Rocky Road Cookies with Chocolate and White Chocolate Chips and Roasted Almonds

5. Now, in a medium mixing bowl, sift together the flour, cocoa, baking soda, baking powder, and salt.  If you hate sifting like I do, you may want to just sift the cocoa and then dump everything else on top of it.  If you’re gonna do that, you need to whisk everything together really well.  This is pre-whisking obviously:

Rocky Road Cookies with Chocolate and White Chocolate Chips and Roasted Almonds

6.  So anyway, add all the dry stuff to the wet stuff, and stir all of it together to form a thick, wet dough.

Rocky Road Cookies with Chocolate and White Chocolate Chips and Roasted Almonds

6.  Oh, and let’s talk for a second about roasting almonds.  If your sliced almonds (0r your whole almonds) are not roasted, pour them onto a cookie sheet in a single layer and stick them in your preheating oven for 2-4 minutes.  When they’re done, they will look just slightly brown and they will smell really fragrant.

Rocky Road Cookies with Chocolate and White Chocolate Chips and Roasted Almonds

7. Now Fold in chocolate chips, white chocolate chips, and slivered almonds.  But not the whole almonds!  You are gonna add those at the very end.  Don’t worry, I won’t forget about them.

Rocky Road Cookies with Chocolate and White Chocolate Chips and Roasted Almonds

7.  Now here’s our total secret to making the cookies all even-sized and bumpy on top: First, take two tablespoons of dough and roll it into a totally round ball (or use a big-ish cookie scoop like the one below). Now tear the ball in half down the middle as evenly as possible. Then place the two halves of dough right next to each other, and kind of smoosh the sides until there is no big seam separating them. I tried and tried to take pictures of this process, but you know how bad my camera is. I took literally a dozen pictures and none of them came out. Sigh.

Rocky Road Cookies with Chocolate and White Chocolate Chips and Roasted Almonds

8. So place your cookies about 2 inches apart on the parchment-lined cookie sheet. When your cookies are all ready to bake, go in and insert whole almonds into the tops of each cookie. Try to do it randomly, so it looks like they just fell there. This will make your cookies mind-bogglingly beautiful. Seriously, people will think you bought them from a bakery. Little will they know that you’re just that awesome.

Rocky Road Cookies with Chocolate and White Chocolate Chips and Roasted Almonds

8. And finally, bake them for 8-10 minutes, until they are spread out and cracked on top.  Let them cool for a couple of minutes on the baking sheet before moving to cooling racks to cool completely.

Rocky Road Cookies with Chocolate and White Chocolate Chips and Roasted Almonds

Here’s some things you need to know about these cookies: First, don’t make them if you don’t have Dutch-process cocoa. The extra dark chocolate makes all the difference in the world. Second, do make them if you don’t have white chocolate chips — just sub more regular chocolate chips. They may not look as impressive, but if anything, they’ll taste even better. Oh, and this is a big one: I normally really adapt a recipe to make it my own before posting it, but this recipe (at least the ingredients part) is taken almost verbatim from Isa Chandra Moskowitz and Terry Hope Romero’s amazing book, Vegan Cookies Invade Your Cookie Jar. Should you buy this book? You should. It’s amazing.

So go make these cookies. And then eat too many of them. And then curse my very name. But don’t talk with your mouth full.

Love,

Ian
1 Comment

Filed under brownies, chocolate, comfort food, recipes

Gluten-Free Almond Cupcakes with Chocolate Espresso Buttercream

I PROMISE THIS ISN’T GOING TO BECOME A GLUTEN-FREE BLOG.

I don’t even like gluten-free baked goods very much.  I love wheat.  Mmmmm . . . wheat . . . nomnomnom.  OK, you happy?  So here are the Gluten-Free Cupcakes I made for the Bakesale For Japan last Saturday.

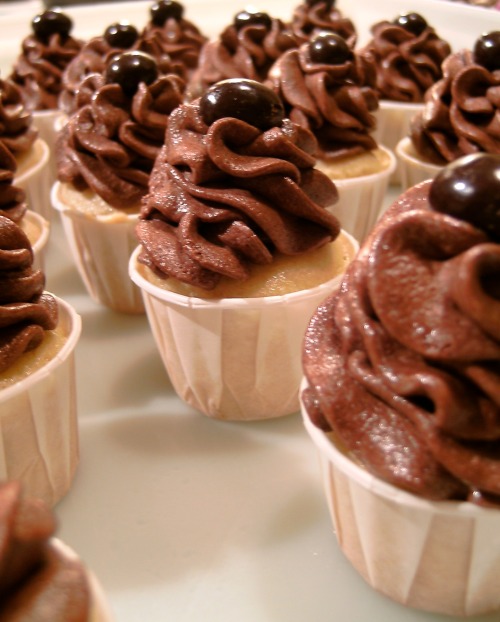
Gluten-Free Almond cupcakes with Chocolate-Espresso ButtercreamThese cupcakes are an interesting size.  I wanted to do smaller than full-size cupcakes for the bakesale, but minis just seemed too small.  Also, occasionally gluten-free cupcakes separate from their liners in a way that’s undesirable.  So I found these paper portion cups at work, and they were the perfect size.  They are almost twice the size of a mini liner, but still almost half the size of a full-sized liner.  So, substantial enough for a bakesale, but not so big as to be intimidating.  So anyway, here’s the recipe:

To make these Gluten-Free Almond Cupcakes with Chocolate Espresso Buttercream, you’re going to need:

3/4 cup white rice flour
1/2 cup chickpea flour
1/2 teaspoon xanthan gum
2 tablespoons arrowroot powder (or cornstarch)
3/4 teaspoon baking powder
1/2 teaspoon baking soda
1/2 teaspoon salt
1 cup almond milk
1 teaspoon cider vinegar
1/3 cup canola oil
3/4 cup white sugar
2 teaspoons pure almond extract
1/2 teaspoon vanilla extract

Gluten-Free Mini Almond Cupcakes with Chocolate Espresso Buttercream

So then, you:
1. Preheat the oven to 350ºF. Line your muffin tin with 24 mini paper portion cups, like Jason in this total action shot:
Gluten-Free Mini Almond Cupcakes with Chocolate Espresso Buttercream
2. In a large bowl, combine the flours, xanthan gum, arrowroot, baking powder, baking soda, and salt. Whisk this mixture together for about thirty seconds, to make sure it’s evenly mixed.
3. Pour the almond milk into a glass measuring cup and add the vinegar to it. Let this mixture sit a few minutes, until the almond milk looks slightly curdled.
4. In a medium mixing bowl, whisk together the oil and sugar until very well combined. Add the extracts. Now beat in the curdled almond milk.
5. Slowly pour the wet mixture into the dry mixture and beat with a whisk for one minute.  As the xanthan gum starts to really activate, it’ll really thicken your batter.  So make sure you beat it until it starts to look much thicker.
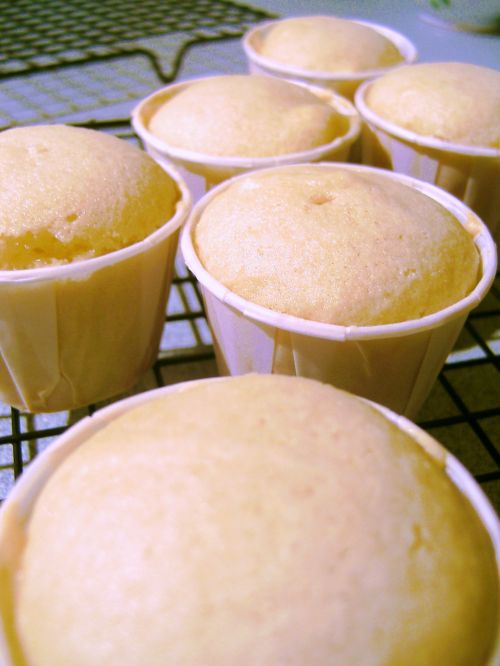
6. Fill your baking cups two-thirds of the way full with batter (which, for these liners, was about two tablespoons per cupcake).
Gluten-Free Mini Almond Cupcakes with Chocolate Espresso ButtercreamThey shouldn’t look any more full than this:
Gluten-Free Mini Almond Cupcakes with Chocolate Espresso Buttercream
7. Bake at 350ºF for about 15 minutes or until a toothpick inserted into the biggest cupcake comes out totally clean.  Depending on the liners you use, you should check these often.  If you’re using smaller liners, these could be done after about ten minutes.  And keep in mind that gluten-free batter tastes gross until it is fully baked, so make sure that your cupcakes are totally done.
8.  Set aside to cool completely.
Gluten-Free Mini Almond Cupcakes with Chocolate Espresso Buttercream

Gluten-Free Mini Almond Cupcakes with Chocolate Espresso Buttercream
So let’s make some frosting!  To make Chocolate Espresso Buttercream, you’re gonna need:

1/2 cup nonhydrogenated shortening
1/2 cup margarine
4 cups confectioner’s sugar
1 cup cocoa powder
1/2 cup almond milk
1 1/2 tablespoons pure coffee extract

So now you:
1. Beat together the shortening and margarine with a stand mixer or hand mixer until it is all fluffy.
2. Sift in 1/3 of your confectioner’s sugar, along with the cocoa (and yes, you have to sift it.  Lumpy frosting is for suckas).  Drizzle in 1 tablespoon of milk.
3. Beat until the sugar and milk are incorporated into the fats, and the whole thing looks like really stiff frosting.  Repeat this in two more steps, until all of the milk and all of the sugar are just combined.  Add your extract and stir to combine.
4. Now, you’re going to beat the whole thing for about four minutes, until it’s all nice and fluffy.
5. Taste your frosting. It should be firm, but creamy, with a pretty strong coffee flavor.  Adjust the milk or sugar to get it the texture you want.  What we’re shooting for here is really thick, but still soft and fluffy.
6.  Now put your frosting in a piping bag fitted with a giant closed star tip, and frost your cupcakes.  We really like these with TONS of frosting on them.  If you want to use a lot less, you could get away with halving the recipe, and very lightly coating the cupcakes.
Gluten-Free Mini Almond Cupcakes with Chocolate Espresso Buttercream
We finished them by placing a whole chocolate covered espresso bean on the top of each cupcake.  This is, of course, totally optional.  Do what you want.
Gluten-Free Mini Almond Cupcakes with Chocolate Espresso ButtercreamSo you may have noticed that our Chocolate Espresso Buttercream doesn’t actually contain any espresso (or butter or cream, actually.  Haha).  I originally tried this frosting with espresso, and then again with a mixture of strong-brewed coffee and coffee extract.  Strangely, the best, most “espresso” tasting flavor came from using only coffee extract.  So, use what you want or call it what you want, but this is what I would recommend.  So there.
Gluten-Free Mini Almond Cupcakes with Chocolate Espresso ButtercreamOh, and one other thing:  If you are absolutely not going to make these because they are gluten-free, you can totally make them with traditional flour instead.  You just omit the rice flour, chickpea flour, and xanthan gum, and replace the whole shebang with 1 1/4 cups of unbleached flour.  You party pooper.

Go Bake,

Ian

1 Comment

Filed under chocolate, comfort food, cupcakes, gluten free, recipes

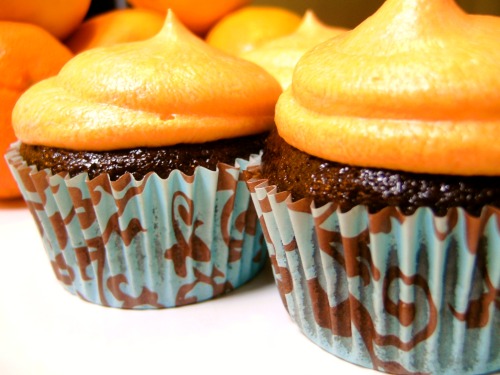
Chocolate Cupcakes with Orange Buttercream

Chocolate Cupcakes with Orange Buttercream

Our friend Noah accidentally put his hand through a glass door a few days ago.  It was even more awful than it sounds.  Like, there were ambulances and emergency surgeries involved.  And do you know what his doctor recommended for his recovery?  Vegan cupcakes.

OK, his doctor didn’t really recommend that at all.  But Jason decided that that’s what he needed.  So we made him some Chocolate Mint Cupcakes and some Chocolate Cupcakes with Orange Buttercream.  And while I have no evidence that the cupcakes have actually helped his recovery, we’re pretty sure they boosted his morale.

So I thought we should post the recipe for the Chocolate Orange cupcakes here.  If you are interested in the Chocolate Mint cupcake recipe, we posted it a few weeks ago, that time with White Chocolate Nautical Shapes on top.  That recipe can be found here.

So for the Chocolate Cupcakes with Orange Buttercream, you’re gonna need:

1 1/4 cups all-purpose flour
1/3 cup Dutch process cocoa powder
3/4 teaspoon baking soda
1/2 teaspoon baking powder
1/4 teaspoon salt
1 cup almond milk
1 teaspoon white vinegar
1/3 cup canola oil
3/4 cup white sugar
1 1/2 teaspoons vanilla extract

So then, you:
1. Preheat the oven to 350ºF. Line your muffin tin with liners that seem to say “get well soon,” or whatever.
2. In a large bowl, combine the flour, baking powder, baking soda, and salt.  Sift in the cocoa.  Seriously, you guys, sift it.  I wouldn’t say that if it wasn’t important.  Now whisk this mixture together for about thirty seconds, to make sure it’s evenly mixed.
3. Pour the almond milk into a glass measuring cup and add the vinegar to it. Let this mixture sit a few minutes, until the almond milk looks slightly curdled.
4. In a medium mixing bowl, whisk together the oil and sugar until very well combined. Add the extracts. Now beat in the curdled almond milk.
5. Slowly pour the wet mixture into the dry mixture and beat with a whisk until the batter looks very smooth. Don’t worry about over-mixing; it’s better to beat it until there are no lumps left.
6. Fill your baking cups two-thirds of the way full with batter (usually about a scant quarter cup of batter per cupcake).
7. Bake at 350ºF for twenty minutes or until a toothpick inserted into the biggest cupcake comes out mostly clean. A few moist crumbs on the toothpick are absolutely fine.

For the Orange Buttercream Frosting, you need:

1/4 cup vegan margarine
1/4 cup non-hydrogenated shortening
2 cups vegan powdered sugar
3 tablespoons almond milk
1  teaspoon pure orange extract
1/2 teaspoon pure vanilla extract
Small drop of orange gel food coloring (optional)

So you’re going to:
1.  With a stand mixer or hand mixer, beat the margarine and shortening until thoroughly combined and fluffy.
2.  Sift in 1/3 of the total powdered sugar.  Add 1/2 tablespoon of milk, and beat until thoroughly combined, scraping down the sides as needed.
3.  Repeat this process twice more, until all of the sugar and milk are combined.
4.  Add the extracts, and beat for 2-3 minutes until thoroughly combined and fluffy.  The longer you beat the frosting at this point, the softer it will become.  So, if you really like fluffy frosting, you can beat it for up to six minutes.  If you want it to be more structural and able to hold its shape, stop after two minutes.
5.  Add a very small amount of orange gel food coloring, and beat just until thoroughly combined.  This stuff is potent, so start with too little and  allow your frosting to get darker incrementally until the desired color is reached.
6.  Add the finished frosting to a piping bag fitted with a jumbo round pastry tip.  Hold the tip about 1/4 inch from the surface of the cake, and squeeze. When the icing is covering the cake, release pressure on the bag, then pull up about a quarter inch, and squeeze again.  When your icing looks about half as big as the first dollop, release pressure on the bag and then pull up to create a small peak.  Let the frosting set for at least ten minutes in the refrigerator before serving, so that it’ll hold its shape.

Chocolate Cupcakes with Orange Buttercream

Chocolate Cupcakes with Orange Buttercream

Do you know someone who’s sick?  I mean, come on, it’s March.  Of course you know someone who’s sick.  So go make them some Chocolate Cupcakes with Orange Buttercream, and watch them get better before your eyes.  Or at least watch them be all grateful, which is pretty rewarding, too!

Love,

Ian

Oh yeah, P.S.  It’s totally St. Patrick’s Day.  So, um, happy St. Patrick’s Day.  We’re honestly not really big on this particular holiday, so we didn’t make anything special for it.  I know you were hoping for Vegan Corned Beef and Cabbage Cupcakes.  Sorry.  Maybe next year!

5 Comments

Filed under chocolate, comfort food, cupcakes, cupcakes, ingredients, recipes

Cardamom Banana Muffins Recipe

As Ian promised yesterday, here is the recipe for the Cardamom Banana Muffins with Nuts that we made a couple nights ago.  I won’t tell you how many of these muffins I’ve eaten in the last 24 hours.  Rest assured, it is a high number.  We all know what a muffin fiend I am.

This recipe is kind of a mish-mash of a bunch of different banana muffin recipes I found online.  It is, in essence, basically banana bread in muffin form.  Oh no, anything but that, right?

Here’s the recipe.  Feel free to play with it; it’s really forgiving.  If you don’t like cardamom, just leave it out.  If you really love cardamom, . . why don’t you marry it?  And add a bit more to the recipe.  The recipe calls for 1/2 cup of nuts; I used a combination of walnuts and pecans (because that’s all that I could find in our freezer).

Ingredients:
2 cups all-purpose flour
1 1/2 teaspoons baking soda
1/2 teaspoon salt
1 1/2 teaspoons ground cardamom
2 tablespoons ground flaxseed
4 very ripe, falling-apart bananas
1 cup brown sugar
3/4 cup melted Earth Balance margarine (put it into a Pyrex measuring cup and melt it in the oven for a couple minutes while your oven is preheating; please don’t use a microwave:  yuck)
1 teaspoon vanilla extract
1/2 cup chopped nuts

1.  Preheat your oven to 375 degrees F; grease your muffin tins or use liners.

2.  In a medium-sized bowl, whisk together your flour, baking soda, salt, and cardamom.  Set aside.

3.  In a small bowl, use a fork to beat together your ground flaxseed and 6 tablespoons warm water.  And I mean BEAT IT.  You want it to get all goopy and egg-like.  Set aside.

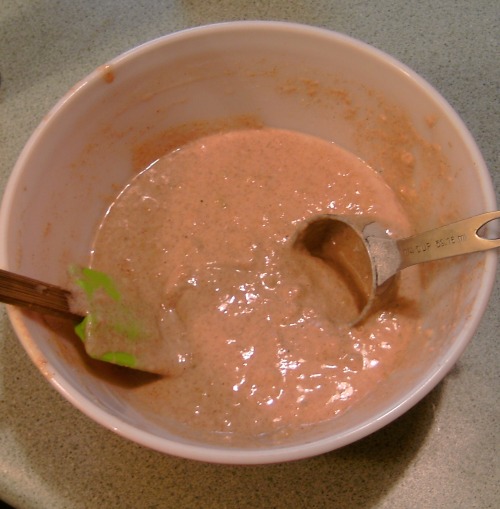
banana muffins in progress

4.  In a large bowl, mash two of the bananas with a fork; try to get as many lumps out as possible.  Add the brown sugar to the mashed banana and beat it with a fork.  Again, I mean BEAT IT.  You want those suckers thoroughly combined.

5.  To the sugar/banana mixture, add your melted butter, flaxseed mixture, and vanilla.  Whisk together until thoroughly combined.

6.  Add your dry ingredients to the wet and mix with a wooden spoon or a spatula, just until there’s no dry flour visible.

7.  In a small bowl (just use your flaxseed bowl, save yourself another dish to wash), smash up the remaining two bananas, but leave some pea-sized chunks.

8.  Fold your newly-mashed bananas and the nuts into the batter.

banana muffins in progress

9.  Fill your muffin tins about 1/2 to 2/3 full and bake for 20-25 minutes,depending on how full your tins are and until a toothpick or chopstick comes out nearly dry (a few crumbs are okay).  Let them cool in the tin for a few minutes before transferring to a cooling rack.

Yield:  16-24 muffins, depending on size.  I only made 16, cuz I like big muffins, and I cannot lie.

Mmmmm, muffins.  Yummy.  Go buy some marked-down bananas on the brink of death and bake some fabulous treats!
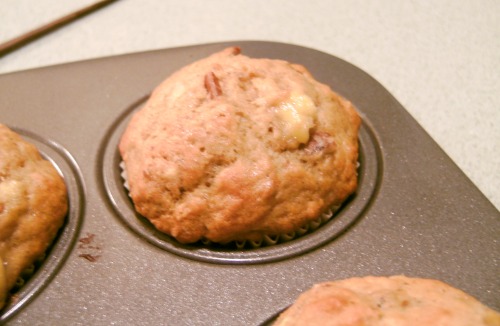
vegan cardamom banana muffin with walnuts and pecans

Love,
Jason

1 Comment

Filed under bananas, ingredients, pecans, recipes, walnuts

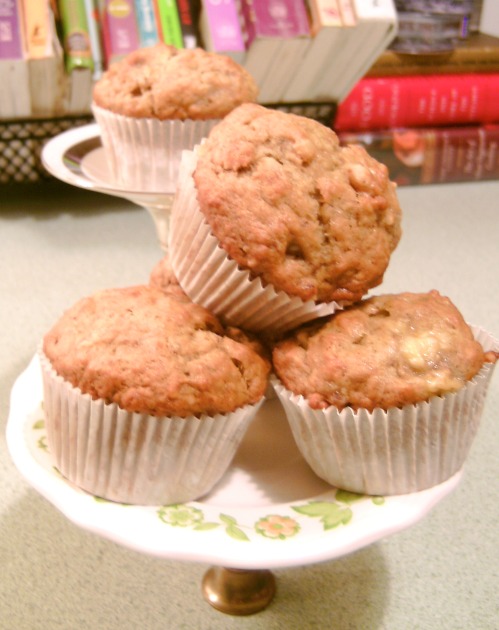
Banana Cardamom Muffins with Walnuts and Pecans

Last night, they were calling for snow.  And Jason and I live in a relatively rural area, and we both have a commute of about 30 minutes every morning.  So if we get any substantial amount of snow, we can’t get to work.  So, just to be on the safe side, Jason made a bunch of muffins to fortify us through a snow day.  And I drank a bunch of wine, confident that I wouldn’t have to get up at 7:00 this morning.  So I bet you can guess what happened.  Needless to say, I am as grateful for the muffins as I am sorry for the wine.  But this blog isn’t about wine (thankfully), it’s about baking.  So let’s see those muffins!

Banana Cardamom Muffins with Walnuts and PecansThese muffins were a fabulous way to use up the end of our old mushy bananas.  Yes, the same bananas from the Best Banana Bread recipe post from over a week ago.  I am so glad to have them gone.  And I am especially glad to have muffins in their place!

Banana Cardamom Muffins with Walnuts and PecansNow, if you know me at all, you’ll know that I am killing time writing about snow storms and posting pictures because in my fragile state, I forgot to bring the recipe for these muffins with me.  Which means that Jason is going to post the recipe tomorrow (which he rightfully should, since these muffins were all his doing anyway).  So I’ll leave you with the promise of a recipe for truly excellent Banana Cardamom Muffins with Walnuts and Pecans tomorrow.

Banana Cardamom Muffins with Walnuts and Pecans

Looking forward to eating more muffins,

Ian

Leave a comment

Filed under bananas, food porn, ingredients, muffins, pecans, recipes, walnuts

Vegan Chocolate Doughnuts!

How much do I love my boyfriend?  Well, enough to make him doughnuts, and that’s no small feat.  A couple of years ago, Vegetarian Times came out with an issue featuring vegan doughnuts.  And, if you’re not vegan, it would be hard for me to explain how amazing that is.  The idea of making vegan doughnuts at home was mind-blowing to us.  Especially Jason, who loves doughnuts more than, well, just about anything.  So, we tried; we made some yeast-risen jelly doughnuts.  They tasted OK, but they were the ugliest things we’d ever seen.  I wish I had pictures.

Anyway, most of the recipes in the VT article called for a mini doughnut pan.  Oh that most elusive kitchen tool.  The article was like, “Go to any Target and pick one up.  No big thing.  La la la.”  Well, needless to say, Target didn’t have them (and yes, all you concerned gays out there, we are boycotting Target now.  But this was in the good old days of consumer ignorance).  And so began the epic quest to find a doughnut pan.

Literally a year later, while we were living in our van in California, we found a mini doughnut pan at a thrift store for probably 75¢.  We debated buying it all afternoon, because we were so poor.  We finally broke down and got it.  Here it is:

Mini Doughnut PanSo we finally tried a cake doughnut recipe from VT, and (cue the trumpet fanfare) it . . . was . . .  OK.  It wasn’t terrible, it just tasted more like cake than anything.  Which, duh.  But I mean, it didn’t taste like a cake doughnut, it just tasted like a dense cupcake in the shape of a doughnut.  What to do?  Well, I decided that what the doughnuts were missing was fat.  Lots and lots and lots of fat.  So, today I experimented with the recipe again today.  Here’s what I came up with.
Ian’s Vegan Doughnuts

You need:
1 cup all-purpose flour
1/2 cup sugar
1/4 cup unsweetened cocoa powder
1 1/2 teaspoons baking powder
1/4 teaspoon salt
1/2 cup plain soy milk
1/3 cup semisweet vegan chocolate chips
1/4 cup vegan margarine
1/2 teaspoons apple cider vinegar
1 teaspoon vanilla
1 1/2 teaspoons Ener-G egg replacer
2 tablespoons cold water
Canola oil for cooking
Powdered sugar for coating

So you’re going to:

1.  Preheat oven to 350°F. Coat doughnut pan with cooking spray.

2. Combine soy milk, chocolate chips, and margarine in a saucepan, and warm until chocolate and margarine are just melted. Set aside to cool.  With a fork in a small bowl, whisk egg replacer with water in small bowl for two whole minutes, until it’s super-foamy.  Whisk this mixture, the vinegar, and the vanilla extract into soy milk mixture.

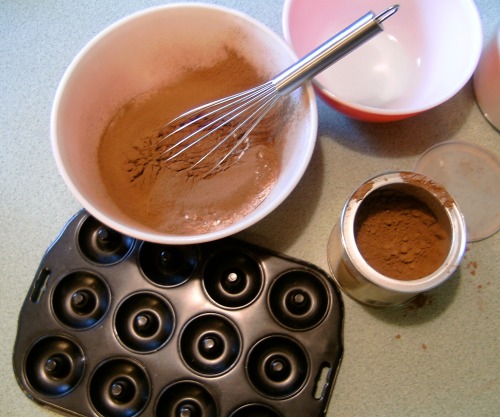
3.  Whisk together flour, sugar, cocoa powder, baking powder, and salt in large bowl.

Dry Ingredients for Doughnuts

4.  Add the cooled soy milk mixture, and stir thoroughly to combine.  The mixture will be VERY thick, almost resembling cookie dough.

4. Fill each doughnut mold half full with batter. Bake 12 minutes, or until toothpick comes out clean. Transfer doughnuts to wire rack to cool, and repeat with remaining batter.  They’ll look more or less like this.

Just-Baked Cake Doughnuts

5.  Now here comes the fun part.  Get out a cast iron skillet (0r any really heavy bottomed pan), and add 1 1/2 inches of canola oil to it.  Place pan over medium heat, and heat oil to 350ºF.  You get bonus points if your bottle of oil is this big or bigger:

So Much Canola Oil

6.  Oh so much canola oil.  Mmmmmm . . . Where were we?  Oh, right.  Let’s deep-fry.  So, when your oil is hot enough, turn the heat down to medium-low and check the temperature pretty often.  If it gets too hot, it’ll burn your doughnuts (and your fingers — take it from one who knows).  If it gets too cool, the doughnuts will end up all soggy with oil, which is so gross.

Frying Chocolate Doughnuts

7.  So drop your doughnuts into the oil, about four at a time.  Fry them on one side for twenty to thirty seconds, flip and repeat.  Your donuts should not stay in the oil for more than about a minute, or they will get all burnt.

8.  Remove the doughnuts from the oil and immediately drain on lots of paper bags, newspaper, or paper towels.  Yeah, I love the earth too, but you can’t avoid this step.  You could drain them on cloth towels, I guess.  They will just get really stained.

9.  Repeat with all of your doughnuts.  Allow to cool completely.

10.  Now that your doughnuts are all cool, place a few at a time into a container with a tight-fitting lid.  Add about 1/2 cup sifted powdered sugar, place the lid firmly on the container, and very gently shake until your doughnuts are covered all over.  It’s important to wait until they are cooled, or the sugar will get all gummy.  It doesn’t taste bad, but it doesn’t look very good, either.  If it happens, you can always re-coat them after they have cooled more.  You can see in my pictures that I didn’t wait long enough for the first ones, but they still tasted great.

Sugar-Coated Chocolate Doughnuts

Sugar-Coated Chocolate Doughnuts

Now, I know you drank your green smoothies all through January, everybody’s proud of you.  But now it’s March, and it’s cold and rainy and you need some comfort food.  So do yourself a favor and go deep-fry some doughnuts.  You’ll thank me.

Love,

Ian

6 Comments

Filed under chocolate, comfort food, doughnuts, doughnuts, recipes

Banana Pancakes with Meyer Lemon Syrup

If you’ve been following the blog at all, you probably know that right now we have a whole lot of meyer lemons and old bananas on hand.  We made some awesome healthy-ish banana bread last week, but we needed to make something else with all of these bananas.

Meyer Lemons and Old Bananas

Sundays are our only day off together, so we usually sleep in as late as we can (8:00 for me, 11:00 for Jason), then get up and slowly cook a big breakfast.  So yesterday, I decided that we should try to make whole wheat banana pancakes.  Our normal pancake recipe uses all white flour and 1/4 cup of oil.  Since we wanted something healthier, we greatly, greatly modified our usual recipe.  And, after a few disasters, found ourselves with pretty nice pancakes.  And then it hit me:  Why not use all of the meyer lemons we have lying around to make a syrup for the pancakes?  Well, we knew it was a bold choice that would either result in a total success or a huge disaster.  And do you think I’d be posting so cavalierly if it had been a disaster?  Well, honestly I probably would.  But that’s moot, because it was a total success!

So, here is the recipe, along with some pictures.  Oh, and if you don’t have meyer lemons, you could probably substitute a big orange and a regular lemon instead.  Or try all oranges, for a sweeter, less tart syrup.  Ooh, I bet blood oranges would make a pretty syrup.  Anyway, you get the point.  Here’s the recipe for the pancakes.

You need:
3/4 cup whole wheat pastry flour
1/2 cup unbleached all-purpose flour
2 1/2 teaspoons baking powder
1/2 teaspoon salt
1 teaspoon cinnamon (don’t leave it out, it really makes the pancakes!)
1 tablespoon canola oil (really, only one tablespoon?  I promise.)
1 1/4 cups almond milk
2 tablespoons water
1 teaspoon pure vanilla extract
2 tablespoons light agave nectar
2 very ripe mashed bananas

So now you’re gonna:
1.  Preheat a very heavy (preferably cast iron) skillet over medium-low heat.
2.  Use a whisk to thoroughly combine the flours, baking powder, salt, and cinnamon in a large bowl.
3.  In a smaller bowl, whisk together the oil, milk, water, vanilla, and agave until well combined.
4.  Pour the liquid ingredients into the dry ingredients.  Use a wooden spoon to combine until all large lumps are gone.  Small lumps are totally OK.  Please don’t overmix this batter, it’s not very forgiving.
5.  Now mix in your mashed bananas gently, until just combined.
6.  Now, you’re gonna do nothing.  No really.  This batter has to rest for a minimum of ten minutes to get all nice and fluffy.  Did you preheat your skillet when I told you to?  Well, then this would be a good time to do that.  You want your skillet to be really well heated when you begin.

Banana Pancake Batter
7.  Now that your batter is all fluffy and beautiful, let’s make some pancakes!  Spray a very small amount of nonstick cooking spray into your pan.  Now take a 1/4 cup measuring cup and fill it with batter.
8.  In a circular motion, starting from the middle of the pan and working your way outward, slowly pour out your batter.  It should look like this:

Pouring Banana Pancake Batter

9.  Now you’re going to do nothing again.  But this time, just for a minute.  You want to watch your pancake, and when it starts to look really dry around the edges, and bubbly all over, it’s time to flip.
10.  Flip.

Flip11.  So, just keep going with that until you use up all the batter.  We like to put the finished pancakes in the oven at 200ºF to keep them warm.
12.  While the pancakes are cooking, we are going to make the Meyer Lemon Syrup.  For this, you’re going to need:

2 meyer lemons
2 tablespoons water
1/2 cup sugar
1 tablespoon arrowroot or cornstarch

So, you are going to:
1.  Juice your meyer lemons.

Juicing Meyer Lemons

Juicing Meyer LemonsOh, in that picture you’ll notice that our lemons are zested.  We just did that so we could freeze the zest for another project. It’s not a bad idea, if you’re using the juice but not the zest of citrus fruits, to freeze the zests.  They’ll keep a couple of months in the freezer, and you can add them frozen to most recipes!  Anyway:

2.  Add the juice to a pot and whisk in the sugar.  Cook over medium high heat until the mixture comes to a boil.  Lower the heat to low and simmer for 5 minutes, whisking often.

Whisking Meyer Lemon Juice and Sugar over Medium High Heat3.  In a small bowl, beat the cornstarch and water together until thoroughly combined.
4.  Add this mixture to the simmering juice/sugar mixture, and bring to a boil.  Reduce heat and simmer for 1 to 2 minutes, until desired thickness is reached.

Now, pour your meyer lemon syrup over your banana pancakes and feast away!  Oh, and we topped ours with blood oranges and more meyer lemons, but that turned out to be overkill.  Pretty overkill, but still.

Banana Pancakes with Meyer Lemon Syrup

Go make breakfast,

Ian

1 Comment

Filed under bananas, ingredients, meyer lemons, recipes

Blueberry Muffins

I love muffins.  Often, Ian could take ’em or leave ’em.  But to me, nothing is better in the morning than a muffin–or two–with a cup of coffee.  The other night, I decided to make blueberry muffins for a staff meeting at work the next morning.  Of course, all of my baking projects begin at 10pm; so, by the time they came out of the oven, it was way past bedtime.

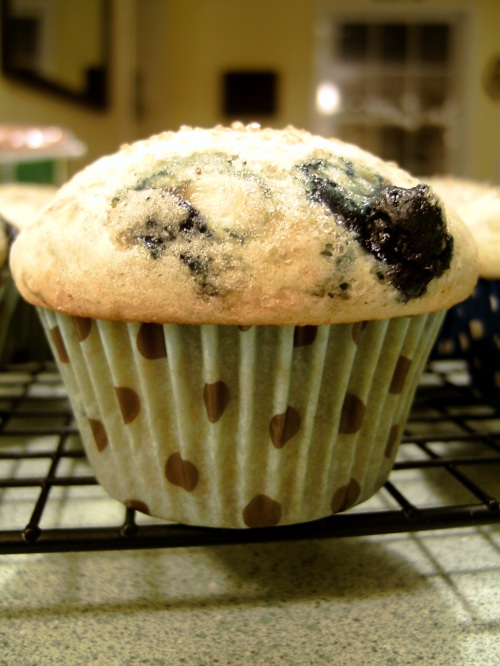
vegan blueberry muffins

Our favorite blueberry muffin recipe is from Isa Chandra Moskowitz’s Vegan Brunch. But we didn’t have any soy yogurt (a key ingredient in Isa’s recipe), so we instead used a recipe from The Joy of Vegan Baking by Colleen Patrick-Goudreau.. They turned out great!

vegan blueberry lemon muffins

My coworkers–usually dubious at best about vegan baked goods–loved them and asked me all kinds of questions about vegan baking.  My goal in baking is definitely not to “fool” people into eating vegan baked goods or to create baked goods that can “pass” as non-vegan.  But it’s always nice when you can see that light go on over someone’s head, and they realize, “Hey, maybe vegans do eat more than carrot sticks and cardboard.”

Anyway, here is the recipe from The Joy of Vegan Baking:

2 cups unbleached all-purpose flour
1 1/2 teaspoons baking soda
1/2 teaspoon salt
Zest of 2 lemons
3/4 to 1 cup granulated sugar
1 cup nondairy milk
1/3 cup canola oil
1 teaspoon lemon extract
1 tablespoon white distilled vinegar
1 1/2 cups fresh blueberries, picked over to remove stems

Preheat the oven to 400 degrees.  Lightly grease your muffin tin.

In a medium-sized bowl, combine the flour, baking soda, salt, and lemon zest.  In a large bowl, combine the sugar, milk, oil, lemon extract, and vinegar.  Mix well.  Add the flour mixture, stirring until the ingredients are just blended.  Gently fold in the berries using a rubber spatula.

Fill greased or nonstick muffin tins about 2/3 full.  Bake until the muffins are lightly browned and a wooden skewer inserted into the center comes out clean, about 20 minutes.  While the muffins are baking, lick the bowl clean.  No eggs means no salmonella!

Remove from the oven and let sit for 5 minutes.  Remove the muffins from the tins and cool on a wire rack.

fresh vegan blueberry lemon muffin

The only changes we made to the recipe were to use liners (because they’re cute, of course) and frozen blueberries (because who can afford fresh blueberries in February?).  And we also added a sprinkle of turbinado sugar on top of the muffins before baking; we love that extra little bit of sweet crunch.

Now’s the interactive part:  do you bake for your coworkers?  If so, what do you bake?  Are you invited to every meeting, in the hope that you’ll bring cookies?  For office parties, does everyone just assume that you’ll bring dessert? Tell us!

Happy Baking!!

Love,
Jason

yummy vegan blueberry muffins

2 Comments

Filed under blueberry, feedback, muffins, recipes